
- Description
- Getting Started
- New Tag
- Quick Tag
- View/Delete Tags
- Options
- Versions
PageTag is a unique pen based application that makes it easy to create, browse and search tags in a Livescribe notebook. It enables the storage of a text (letters or digits) tag, date & time of creation, and location information (notebook, page number and page coordinates).
Important Features are:
- Tags can be browsed or searched, on the pen itself
- Customization options allow the selection and ordering the metadata to be displayed
- Flick through the information to quick find that important question in class or the action item in the meeting
- QuickTag to place tags without having to create the text (i.e. circle existing notes, and tag it as important)
- Tap 'N Pick existing tags and reuse
- Tutorials to practice writing and double tapping
- Limit is 200 tags. Entries need to be deleted to make space.
Tags are created using on-pen Hand Writing Recognition (HWR). PageTag supports creation of English/ Numeric Tags for any Locale.
Launch PageTag via the Application Menu or Command Option
- The penlet will detect that you do not have any tags created, and will automatically take you to the help menu option. This will be default behavior till you create your first tags in the system.
- If MUTED, you will see a message telling you to UNMUTE for best experience while using Help.
- For other operations MUTE will not reduce the experience.
- Navigate into this option, and learn about tags and complete the 4 tutorials.
- The goal of the tutorials is for you to learn how to write so as to get 100% accurate hand writing recognition. It is important to write at a natural speed. A pause will complete the recognition.
- Double Tap is an important gesture, so make sure that you practice that as well.
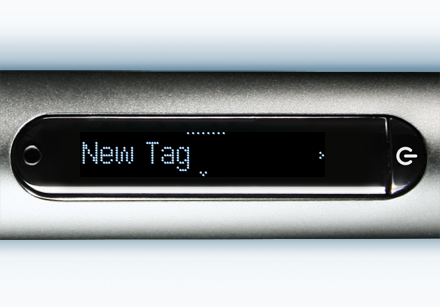
- Navigate to the main menu, and scroll up to the first option (New Tag)
- Select using the Right Arrow on the Nav Plus
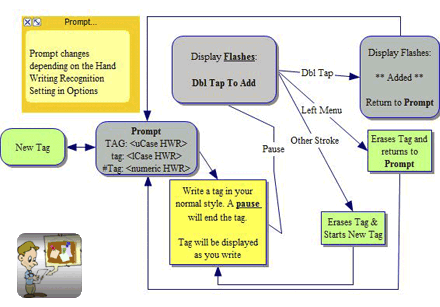
- You should see the TAG: prompt.
- The upper case indicates that the pen will recognize upper case handwriting only.
- You can create tags in lower case or numeric format by selecting that option in the Options Menu.
- Write a word in Upper Case letters (just like you did in the tutorial)
- Pause when you are done.
- The display should flash "Dbl Tap To Add"
- Double Tap to accept - ** Added ** will flash on the display. You will be returned to the TAG: prompt
- or write to clear the tag and restart.
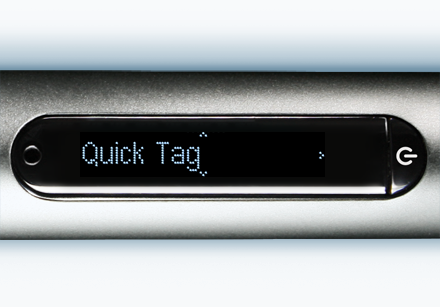
- Select using the Right Arrow on the Nav Plus
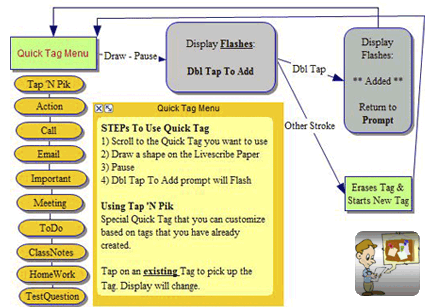
- You now have a choice of 9 pre-defined tags, and 1 custom tag (Tap 'N Pik)
- Tap 'N Pik - tap on a tag that you have created previously to load the text into this slot
- Pre-Defined Tags -
- Action, Call, Email, Important, Meeting, ToDo, ClassNotes, HomeWork, TestQuestions
- Scroll to the tag that you would like to use
- Draw or write something on the paper
- Wait for Dbl Tap To Add to flash on the display
- Dbl Tap to add. Any other key to start over.
Browsing Tags
- Navigate to the Browse Option
- You should see the number of tags enclosed in square brackets (next to the option)
- Select using the Right Arrow on the Nav Plus
- Scroll up and down to view the tags
- Tag Fields
- Tag, Page Number, Document are shown.
- Date, Hidden, Location are hidden
- This can be customized using the Select Tag Data, Set Tag Order options in the Options Menu
Deleting Tags
- Browse to a tag
- Right Nav+ option -> Delete Y/N prompt -> Right Nav+ to delete

Select Tag Data
- Use this option to select the fields that will be shown in the Browse/Search results
- Navigate to the field that you want to change
- Use Right Nav+ to toggle between Shown -> Hidden
Order Tag Data
- This option controls the order of the fields shown in the Browse/Search results
- Scroll to Slot 1: Finalize the field by using the Right Nav+. All fields are available.
- Scroll to Slot 2: Finalize the field by using the Right Nav+. Field in earlier slots are not available
- Scroll to Slot 3: Finalize the field by using the Right Nav+. Field in earlier slots are not available
- Scroll to Slot 4: Finalize the field by using the Right Nav+. Field in earlier slots are not available
- Scroll to Slot 5: Finalize the field by using the Right Nav+. Field in earlier slots are not available
- Slot 6 is now fixed
Hand Writing Recognition Mode
- By Default -> Upper Case
- Use Right Nav+ to cycle through the three options : Upper Case, Lower Case, Numeric
- This can be changed at any time without impacting existing tags
- The New & Search Tag prompts change to indicate the mode that is being used.
- Upper Case: TAG or SRCH
- Lower Case: tag or srch
- Numeric: #Tag or #Srch
Page Offset
- Only use this option when the page number shown in the tag data does not match page number printed in your book
- Right Nav+ -> Double Tap on Page that has Printed #1.
- This can be changed at any time, and does not impact how the data is stored.
- You only need to do this once. The penlet will remember the document to offset relationship.
Change Log
Version 1.1 - Release Date Feb 16, 2011
- Bug Fix
- Hand Writing Recognition not working when pen is set to non English locale
Version 1.0 - Release Date Jan 27, 2011
- Initial Release
(c) 2010 Quasar Solutions LLC.
Updated March 17, 2011